Showing posts with label farmers market. Show all posts

Monday, June 4, 2012

Peaches

In addition to feeling adventurous at the Farmers Market, my friend insisted that I buy some good old peaches while I was there. So I bought a nice big bucket of them and decided to have some fun with desserts. I found a nice recipe for Whole Wheat Peach Kuchen in my Simply in Season cookbook (p. 156). While in the middle of making it, my work-wife stopped over and asked what I was making. I said, "I think it's called koo-CHEN...?" Then she looked at my recipe and said, "Oh, you mean KOO-ken? It means 'cake' in German." So... apparently it's cake (but honestly, it's more like a cross between a pie and a cheesecake, but whatever).

Crust
1 1/4 cup whole wheat flour
2 Tbs sugar
1/4 tsp salt
1/4 tsp baking powder
1/4 cup butter

Combine dry ingredients in a large bowl. Cut in butter until crumbly. Pat mixture over bottom and sides of a pie pan. (Note: I really think this may have been slightly too much crust for my pie pan; however, this pan was a little shallower than my glass Pyrex pan, so maybe I just need to use a deeper pan. Beats me, but you may want to consider adding slightly less flour.)

Filling 1
4 cups peeled peach halves
3 Tbs sugar
1 tsp ground cinnamon

Arrange peaches cut-side-down on top of crust. Sprinkle sugar and cinnamon over peaches and bake at 400°F for 15 minutes.

Filling 2
1 cup yogurt or sour cream
1 egg
2 tsp sugar
1/2 tsp vanilla

Combine and pour over peaches and continue baking for 30 minutes or until set.

Who doesn't love a good kuchen?

So the kuchen was pretty good. It was a nice way to mix things up. The creamy topping was superb (I ate quite a bit of it before I dumped it on top of the peaches!). One issue I had was that when I decided to make it, I probably didn't have quite enough peaches yet and they were very small on top of it. So next time I'll definitely need some more!

After I ate all the kuchen up, I decided I wanted more peaches, so I bought another bucket the next week. This time, I wanted to take an old favorite at my house and make it from scratch.

My mom made this really yummy and easy dump cake. Basically you grease a cake pan with a stick of butter. Then you add two cans of pie filling (same flavor or you can do a different flavor on each end) and then pour a box of yellow cake mix on top. Finely slice up the rest of the butter stick and lay it evenly across the top of the cake mix. Bake at 350°F for about an hour.

So even though my mom's recipe is super delicious, I wanted to try to make it from scratch. One thing that really got me when I read Kitchen Counter Cooking School was the part where her husband came to the realization that boxed cake mix is nothing more than flour, sugar, baking powder, and salt (and a bunch of preservatives to keep it 'fresh'. Bottom line is that it's really not any more difficult to make a cake from scratch, but there's this stigma that it's actually really hard and that's why you make the boxed stuff. So I decided to try out their recipe for cake mix (p. 207) and I substituted fresh fruit and honey for the pie filling.

1 stick butter
Peaches
Strawberries
Honey
2 1/2 cups flour
2 1/2 tsp baking powder
1 3/4 cups sugar
1/2 tsp salt

Cut up and peel fruit into medium chunks. Cover with honey in a bowl and let sit for a few hours or overnight. Grease 9x13 cake pan with butter stick. Spread fruit/honey mixture over bottom of the pan. Mix flour, baking powder, sugar, and salt, and then pour on top of fruit. Sprinkle little butter slices over the top of the cake mix so that the pan is well-covered. Bake at 350°F for about 1 hour. Cool and serve with cream or ice cream.

Yums.

Again, I think the cake mix recipe may have been a bit too much for what I was doing, so I will probably cut back a little bit next time, maybe to 2 cups flour, 1 1/4 cups sugar (it was a little too sweet), and maybe 2 tsp baking powder. It was still very delicious and what I really love about dump cake is that it is just as good when it's leftovers the next day. And the next day too... if it lasts that long. So I'd say it was a pretty successful transformation that will need some minor adjustments to reach perfection.

Kale

Lately I've been very experimental at the Farmers Market. A couple weeks ago, I bought a bag of kale and was like, "I have no idea what to do with this, but I'll figure something out." The farmer recommended kale chips and a few other things, but didn't give me a recipe card, so I forgot half the things they told me I could do. Instead, I opted to check out my cookbooks for some inspiration. I realized that my Farmer John's Cookbook had not been getting the attention it deserved, so I started there and found a great recipe for Cajun Corn and Kale Salad (p. 226). Since I'd already bought a couple ears of corn, it seemed like a perfect way to go through my purchases. Below is my very modified version of this because I didn't have a lot of the ingredients, so I just adapted it to make it work.

2 ears sweet corn
as much kale as your heart desires
salt
1 sweet pepper
1 hot pepper
1 tomato
1 onion
1 clove garlic
leftover cucumber
olive oil
lemon juice
cayenne pepper
black pepper
ground mustard
thyme? (I don't remember if I had some, but the recipe called for it)

Bring large pot of water to boil. Add corn ears. Turn off heat and let sit for about 5 minutes. Pull out corn to cool and remove kernels from cob.
Re-heat water and add kale with a sprinkling of salt. Cook for about 5 minutes. Strain and cool. Remove excess liquid and finely chop.
Cut up other ingredients and mix everything together. Season with additional salt.

 Behold, sweet deliciousness.

I added a lot of cayenne pepper, so it was pretty spicy, but I absolutely loved it! I took it to my neighbors' place, who were serving Korean food for dinner that night. Normally I wouldn't think Cajun-style salad would go with Korean food, but they were making spicy food so it actually complemented everything quite well. It really was a great summer salad that can add a refreshing taste to just about anything. I'm really excited to make it again.

I also made some kale chips using a pretty basic recipe.

kale
olive oil
sea salt
pepper
lemon juice
additional flavors/spices, if you're so inclined

Wash kale and cut into bite-sized pieces. Sprinkle with additional ingredients on a cookie sheet. Bake at 275°F for about 20 minutes or until crisp, turning once halfway through.

Crispy Little Kale Bits
 
So the first thing you need to know about kale chips is that they are pretty gross if they aren't completely dry and crisp. But if they're done, they're alright. There's not much to brag about, but kale is so good for you, I don't really mind eating it this way to get the nutrients out of it.

I haven't been as good about making smoothies lately, but I think once I get myself back on board, I would like to try adding a little bit of kale to them. It doesn't really taste like much and seems to blend in pretty well, so that's my next step I think.

Sunday, May 6, 2012

Summer Squash

If you've been wondering where I've been hiding the last few weeks, I've been buried in school work and eating more burgers and pizza than I care to admit. But now that school is out, I'm slowly getting back into my cooking groove. Arlond and I visited the farmer's market this week and picked up lots of yummy food–most of which I haven't done anything with, yet. But I'm slowly working on it.

Anyway, while we were there, one of the farmers was selling yellow summer squash. My parents never really cooked squash for us when we were kids, so I've never been really comfortable eating it. I usually would just pick around it if it were in something. I did eat zucchini bread and things like that, but not much of anything else. Recently, I was served raw summer squash slices and I figured I'd try them out. And they were pretty good. I enjoyed their light, nutty flavor and they weren't so watery like cucumbers. So I bought some at the grocery store to put in my minestrone-ish soup, and that worked out really well, too. So I checked out the squash and asked the farmer how he liked to prepare them so I could get some more ideas. He said he ate them raw and would boil them, but only just a little bit, and said his wife made this really good stuffing with cottage cheese and cornbread with it. I could see the sweet fondness he had for the dish as he recalled just how much better it tasted two or three days after it had been cooked. He turned to his wife and asked if she had the recipe and she pulled out a half piece of paper with the recipe for squash cornbread. So I bought a basket of squash and took the recipe home and sat on it for a few days until I finally forced myself to stop being lazy and make it before the squash went bad. The recipe called for an 8x12 pan, which is way too big for me to eat by myself, so I opted for a half-portion, as detailed below:

Squash Cornbread:

1/2 cup boiled chopped squash (drain through colander)
1/2 stick butter (melted)
1/2 cup cottage cheese
1/2 chopped onion
1 chopped jalapeno pepper (the recipe called for 1 can of chopped green chilies, but I opted to go with fresh peppers instead)
1 egg
3/4 cup cornmeal
1/4 cup flour
1 1/2 tsp baking powder
Whatever 1/2 a pinch of salt is (You can also substitute a box of cornbread mix for the last four ingredients)

Mix all ingredients. Bake at 375°F in greased 8x6ish pan for about 25 minutes.

I meant to take a picture before I started eating it, but I forgot.

All in all, it was pretty delicious. It's definitely a great side to add on to a meal and relatively quick and easy to make. I put the rest in the fridge, so we'll find out tomorrow just how good the leftovers are.

So after I made my mini-squash cornbread, I still had two more squashes to use up. I pulled out my Simply in Season and looked for some ideas. I found a recipe for zucchini cookies, and figured it was close enough to what I needed.

Yellow Squash Cookies (adapted from Simply in Season, p. 166):
3/4 cup butter (softened)
1/2 cup sugar
1/2 cup brown sugar
1 egg
2 1/2 cups flour
1 1/2 tsp baking powder
3/4 tsp salt
1 tsp vanilla
1 1/2 cups summer squash (shredded)
3/4 cup chocolate chips

Cream butter, sugar, and brown sugar. Add egg and beat until fluffy. Mix in flour, baking powder, salt and vanilla. Slowly stir in squash and chocolate chips. Drop onto greased baking sheets. Bake for 10-12 minutes at 375°F. (Note: Bake cookies as soon as they are mixed. If the batter stands too long, it will get a bit watery).

You can never go wrong with cookies.

So I was a little short on chocolate chips, but I had one Hershey's bar and cut that up and added it in too. I think what I liked most about these cookies was the nutty flavor without the nuts. Call me crazy, but I really hate nuts in my baked goods. Not because I dislike nuts, but I dislike having hard bits of nut inside my soft, gooey cookies and brownies and cake. So it was nice getting that flavor while still having an overall soft consistency. 

So summer squash is definitely a go for me. I'm not sure if Arlond's going to get on board, but I'll make sure he tries some when he gets home and see what he thinks.

Friday, February 10, 2012

Thanksgiving

In case you were unaware: Thanksgiving happened.

Since my husband and I moved away from our families this summer, it was the first time we were having a big holiday on our own. We certainly missed our families, but we wanted to do something fun instead of wallowing over the holiday weekend. One of Arlond's co-workers graciously invited us into her home on Thanksgiving, where we had a very yummy traditional turkey dinner.

Then on Saturday, Arlond and I invited some friends over and had our very own Thanksgiving feast. We'd both helped out with big holiday meals before, but this was the first time we did it on our own. So naturally, it was an adventure.

First things first, we had to decide on a menu. After careful debate, we finally settled on the following:

Organic Free-Range Roasted Turkey
Gravy
Mediterranean Stuffing
Mashed Potatoes
Deviled Eggs
Cranberry Sauce
Sweet Potato Casserole
Persimmon Bread Pudding
Pumpkin Pie

Note: Our friends also brought rolls, salad, and green bean casserole.

Next, we had to figure out how to make all of this. We'd made mashed potatoes, sweet potato casserole, and deviled eggs a million times, so that was no problem, but pretty much everything else was a first. My dad is the ultimate turkey expert, so I called him and made him tell me everything there is to know about cooking turkey. I took notes on an envelope. Here are some excerpts from our conversation:

"How many people are you serving? 8? You'll probably need at least a 12-pound turkey so you have leftovers." (This was WAAAAAY too much turkey. I really probably only needed 8-9 pounds, but I think we ate most of it... eventually.)
"Defrost the turkey." (I just bought a non-frozen one. Check.)
"I don't really know what the recommended cooking temperature and time are off hand. Just look them up online. There are charts." (Note: These charts are all for conventional turkeys...which will come into play as the story progresses...)
"Find a stuffing recipe you like. Try to find a really moist stuffing so your turkey will be moist too. I really like stuffing so I stuff as much stuffing into every nook and cranny of the bird. Once the bottom gets full, I'll shove some in the neck cavity too. Toothpicks are really good for holding everything in. I usually still have more stuffing leftover, so I'll wrap it up in foil and cook it next to the turkey." (Yeah, my dad really is obsessed with stuffing. I never really cared for it and was really only making it for the sake of a moist bird. The side pouch is a good way to set stuffing aside for your vegetarian friends and family, too!)
"Put your turkey in a foil pan or a roasting pan if you have one, but the foil pan will work. Then pour milk all over it. Pour until you've got between 1/2 and 1 inch pooled at the bottom of the pan. Then take a stick of butter and rub it all over the turkey. Like, the whole stick. Then put it in the oven and every 15-20 minutes rub more butter on it. Just use one of those pop-up timers so you'll know when it's done." (The butter and milk sounds pretty ridiculous, but it is amazing. My dad makes the best turkey ever, so this is solid gold advice right here.)

So then I asked my dad about making gravy:
"I'm not really that great at making gravy. It usually tastes good, but it always looks bad. It's probably because the turkey juice is so buttery. So I'd recommend trying to skim off as much grease as possible before starting. But stir the turkey juice in a sauce pan on low heat and slowly add in flour and water until it looks like gravy. If it's too thin, add more flour. If it's too thick, add more water. If you need more gravy, you can just water it down some more and then add more flour to thicken it back up."

So there you have it. My dad's uncanny turkey wisdom. Next I had to figure out about stuffing. As I mentioned more subtly earlier, I hate stuffing. Savory stuffing tastes like over-parsley-ed soggy bread, and I have a strong aversion to sweet stuffing (my dad's preferred choice) because I just can't accept mixing sweetness and meat juice together. It just doesn't seem right. So I perused my Better Homes and Gardens Cookbook and found a recipe for Mediterranean Stuffing (p.481):

8 cups Italian bread cubes
3/4 cup chopped bell pepper
1/2 cup chopped onion
3 cloves minced garlic
1/4 cup olive oil
1 tablespoon lemon juice
1 teaspoon rosemary
1/8 teaspoon cayenne pepper
1/4 cup parsley (I think I toned this down a bit though)
1 to 1 1/4 cup chicken broth

1. Place bread cubes in single layer on a cookie sheet. Bake at 375°F for 10 minutes or until golden, stirring once, set aside.
2. Cook bell pepper, onion, and garlic in hot oil for about 4 minutes or until tender. Remove from heat and stir in lemon juice, rosemary, and cayenne pepper. Toss bread cubes, onion mixture, and parsley in a large bowl. Drizzle with enough broth to moisten.

Better Homes and Gardens also hooked me up with an amazingly easy recipe for cranberry sauce (p. 522):

1 cup sugar
1 cup water
2 cups cranberries

Combine sugar and water in medium saucepan and bring to a boil for 5 minutes to dissolve sugar. Add cranberries. Return to boiling, then reduce heat. Boil gently and uncovered until cranberries pop, stirring occasionally.

I had recently bought some persimmons from the farmer's market and wasn't sure what to do with them until I found the recipe for persimmon bread pudding on the Whole Foods website.

For the pumpkin pie, I wanted to use real pumpkin instead of the canned pumpkin, so I compared notes between my mom and Better Homes and Gardens, and used this recipe:

Crust:
1 1/4 cups flour
1/4 teaspoon salt
1/3 cup butter
4-5 tablespoons cold water

1. Mix flour and salt in medium bowl and add butter and mash in until butter is in pea-sized pieces.
2. Sprinkle water over mixture and blend. Repeat until dough is moistened. Form into a ball.
3. Roll out dough until about 12 inches wide. Place in pie pan and trim edges.

Pie:
2 cups puréed pumpkin (Cut up pumpkin and roast for about an hour. Peel and purée.)
1/2 cup sugar
1 heaping teaspoon cinnamon
1/2 heaping teaspoon ginger
1/4 heaping teaspoon nutmeg
1/4-1/2 teaspoon cloves
2 eggs
3/4 cup heavy whipping cream

1. Preheat oven to 375°F. Combine pumpkin, sugar, and spices. Add eggs, beat lightly with a fork until combined. Gradually add cream, stir until just combined.
2. Place pie pan and crust on oven rack and carefully pour filling into pastry shell. Cover edge of pie with foil to prevent over browning. Bake 25 minutes, remove foil and bake another 25 minutes until it passes the toothpick test.

Then the big day came. We had most of the ingredients on hand, but we had to buy a few things that day. We inevitably made three trips to the grocery store when it was all said and done, but oh well. We started off with prepping the turkey and the stuffing:

Our beautiful turkey friend, "Hank", named after his cousin on New Girl

Thanks to my crafty chicken de-boning skills, I easily pulled this right out. I'm pretty sure it's Hank's man parts, but Arlond tried to convince me that it was his neck. Either way, I'm not ashamed to admit that I played with it for like 10 minutes before Arlond made me throw it away.
 
Everything started off really well and was going smoothly. And then Hank had a little surprise for us about an hour before he was supposed to be done...

Arlond: "Uh... Hank's done."
Me: "What do you mean, he's done?! He's got like another hour!"
Arlond: "No. the pop-up popped up. I checked with the meat thermometer and he's done."

This is when things started to get crazy.

Between the two of us, we had just started the deviled eggs, cranberry sauce, mashed potatoes, sweet potato casserole, and bread pudding. And now the turkey needed to be carved and gravy needed to be made. So the bread pudding and sweet potato casserole got finished up first so we could throw them both in the oven. Then we had to get the deviled eggs done so they were out of the way because they were EVERYWHERE. Arlond continued to work on his little mashed potato project by himself and the cranberry sauce was pretty self-sufficient and only needed an occasional stir-up from me. Meanwhile I'm praying someone will show up early and save us from this nightmare (PS: No one did). And Hank pretty much got the shaft after he got done early.

Why did he get done so early you ask? Here is my theory: As I mentioned previously, Hank was an organic free-range turkey. Conventional turkeys are actually grossly mis-proportioned because they are systematically bred to have the biggest breasts possible (everyone's favorite part... except me). Their breasts are so big they can't even stand up or walk. Turkey production is so messed up that almost no one raises turkeys that are reproduced the old-fashioned way. Instead, humans have to artificially inseminate the lady turkeys. (For more information, check out this article, or read Animal, Vegetable, Miracle). This sounds pretty awful and I wanted Hank to have a happy and full life. So as a result, his breasts were significantly smaller than a conventional turkey's breasts and so the section of the turkey that typically takes longest to cook because it's so big didn't take as long for Hank.

So about 45 minutes later when everything else was finally under wraps, Hank sat patiently waiting for more attention. We stuck him back in the oven for 15 minutes or so to warm him back up, and I think this ultimately led to his slight drying out. He wasn't dry dry, but he wasn't as juicy and tender as my dad's turkeys. A work in progress and not too bad for a first attempt, if I do say so myself.

After we took Hank back out of the oven, I drained the leftover turkey juice into the sauce pan and started adding flour. I was going very slowly and patiently, adding flour little by little. Once it got nice and thick, I added some water. This is about when I realized I should've been alternating flour and water, because it started getting even thicker. So I basically had a brown paste with a mild gravy flavor. Once I got it back to an appropriate consistency, I salted the bejeezus out of it and called it good. Not the best gravy ever, but passable. And again, now I know for next time.

Looks like gravy to me

Then after everyone showed up, we had a lovely meal:
My excellent carving job (I had no idea what I was doing)

 Deviled Eggs, Stuffing, Cranberry Sauce, and Sweet Potato Casserole

Persimmon and Chocolate Bread Pudding

Made-from-scratch Pumpkin Pie 
So in the end, it wasn't perfect, but it was delicious and rewarding. Everyone enjoyed everything and had a good time hanging out. It was definitely a learning experience, and I'm excited for my next big holiday so I can show off my mad skillz (Easter, anyone?).

Friday, September 23, 2011

Leftovers

Let me just preface this whole post with something. Generally speaking, I hate leftovers. There are a few exceptions to this rule (lasagna), but for the most part, I'm pretty sick of eating something after one or two days in a row. Furthermore, my husband is not really any better, which is apparently weird.

One time, a few years back, I was at my (male) friend's parents' house and I was trying to make room for the food that was going to be dinner that night, and with three teenage boys living at home, there wasn't much room left. So I threw away my friend's leftovers from the day before thinking, Who's gonna eat these leftovers when we have all this fresh food that needs to be eaten? And that's when I found out that you're apparently not supposed to touch a man's leftovers. Ever. Unless they're my husband's leftovers. You can throw those away because he's not gonna eat them unless I make it happen.

That being said, I'm trying to do three things in regards to leftovers:

1. Figure out how to make things in smaller portions.

2. Re-invent my leftovers to take on a new form.

3. Freeze everything else.


I've successfully made a few things with smaller portions. My best accomplishment to date, is making mini-lasagna. My original recipe is for a 9x13 pan, but my husband and I could barely finish it. I would usually eat three or four big pieces and make him eat at least three (He is not as big of a fan of these leftovers as I am). So we cut it down to a 9x9 pan, which makes about 5 servings, which is just enough for the two of us. More recently though, I made lasagna for myself is an 8x6 which was just right with about three servings. I've also made a single serving eggplant burger, chicken, and a few other things. My biggest problem tends to be anything with eggs or yeast, because you can't really include half an egg or half a yeast packet, can you?

Going along with making smaller portions, I've also been working on purchasing smaller portions. Sometimes when I'm at the farmer's market, I'll see these huge baskets of tomatoes or okra or strawberries or whatever, and I know there's no way I'd be able to finish the whole basket. Some of the farmers have been kind enough to offer me a half-portion or allow me to buy the amount I need. I had a really nice farmer at one market that was selling a big basket of tomatoes for $4. I told him I really only needed one or two, so he gave me two "ugly" tomatoes for $1. Another farmer was selling quarts of strawberries and I didn't think I could use that much, so she offered me a pint for half the price.

My other problem area is meats. I feel silly asking for only half a pound of ground beef, but when I'm only making food for one or two, that's really all I need. So I've been brave and asked for the amount I need.

My other other problem area is restaurant leftovers. I never seem to eat them after we leave the restaurant. Why I ask them to box them up is beyond me, but I do it. In order to prevent this whole predicament, I usually try to get my husband to share something with me. Unfortunately, we often have different tastes or he's "really hungry" and won't want to share. Last time we compromised and I got a small dish (quesadilla appetizer) and he got a big dish that I also wanted (burrito) and we split them.

Reinventing has been my most successful endeavor, I think. It is especially good with leftover meat dishes from restaurants. My leftover steak from Benjy's? I put it in my omelet the next day. My leftovers from the Vietnamese place? Omelet. My leftovers from my fajitas? Stir-fry, though they might've made a nice omelet too, I don't know. I put leftover chicken on salads. Leftover ribs can become pulled pork sandwiches. The list goes on. My biggest problem is just not knowing how to make it different from what I was already eating, but throwing stuff in my omelets seems to work pretty well as a fallback plan for now.

Freezing things has also worked pretty well. I already freeze my pizza dough because it makes enough for two large pizzas, but now I've started freezing it in smaller portions and I make mini-pizzas. I've also been making batches of pancakes and freezing whatever I don't eat. This has been the best thing ever because it makes making breakfast so easy. I just pop a couple in the microwave and BAM! Breakfast is served.

I added banana slices one time but I don't think they froze as well. They were excellent fresh though!

Whole Wheat Pancakes (From Better Homes and Gardens, p. 137)
1 3/4 cups whole wheat flour
2 tablespoons packed brown sugar
1 tablespoon baking powder
1/4 teaspoon salt
1 egg, slightly beaten
1 1/2 cups milk
3 tablespoons cooking oil

1. In a large bowl stir together flour, sugar, baking powder, and salt. In another bowl use a fork to combine egg, milk, and oil. Add egg mixture all at once to flour mixture. Stir just until moistened (batter should be slightly lumpy). If desired, stir in desired fruit.

2. For each standard-size pancake, pour about 1/4 cup batter onto a hot, lightly greased griddle or heavy skillet, spreading batter if necessary. For dollar-size pancakes, use about 1 tablespoon batter. Cook over medium heat for 1 to 2 minutes on each side or until pancakes are golden brown, turning to second side when pancakes have bubbly surfaces and edges are slightly dry. Serve warm. If desired, top with syrup.

Meatballs was another very freezable meal. I can add a few to spaghetti, make meatball subs, or just eat them by themselves. What I really like is that I can put all of them in one freezer bag and pull out just what I need.

 Open-Faced Meatball Sandwich

Meatballs (from The Newlywed Cookbook, p. 72)

1 pound lean ground beef
1 small onion, diced (about 1/2 cup)
1/4 cup Italian-style dry bread crumbs
1 egg
2 tablespoons chopped fresh Italian parsley (or just regular, dried parsley, or Italian seasoning)
1/2 teaspoon salt
1/4 teaspoon ground black pepper
2 teaspoons olive oil

1. In a large bowl, combine beef, onion, bread crumbs, egg, parsley, salt, and pepper. Mix well with your hands and form mixture into 16 2-inch meatballs.
2. Heat oil in a large non-stick skillet over medium heat. Add meatballs and sauté 5-7 minutes, or until browned on sides.

Top with marinara, cheese, etc. Same goes for the leftovers. Just dump whatever you want on them and throw them in the microwave.

Okra and Eggplant

Hello, blogosphere. It's been a while. Here's a quick update on my non-foodie life: I've been working a lot. And I started school again in August. So I've had zero time for blogging. BUT! I have had time for cooking. And eating. Which we will discuss. Today.

So as I mentioned in my previous entry, I decided to experiment with the okra and eggplant that I bought at the farmer's market. I've eaten okra a few times prior to this, but I'd never cooked it on my own. Eggplant, on the other hand, was completely foreign to me. And so, my adventure began.

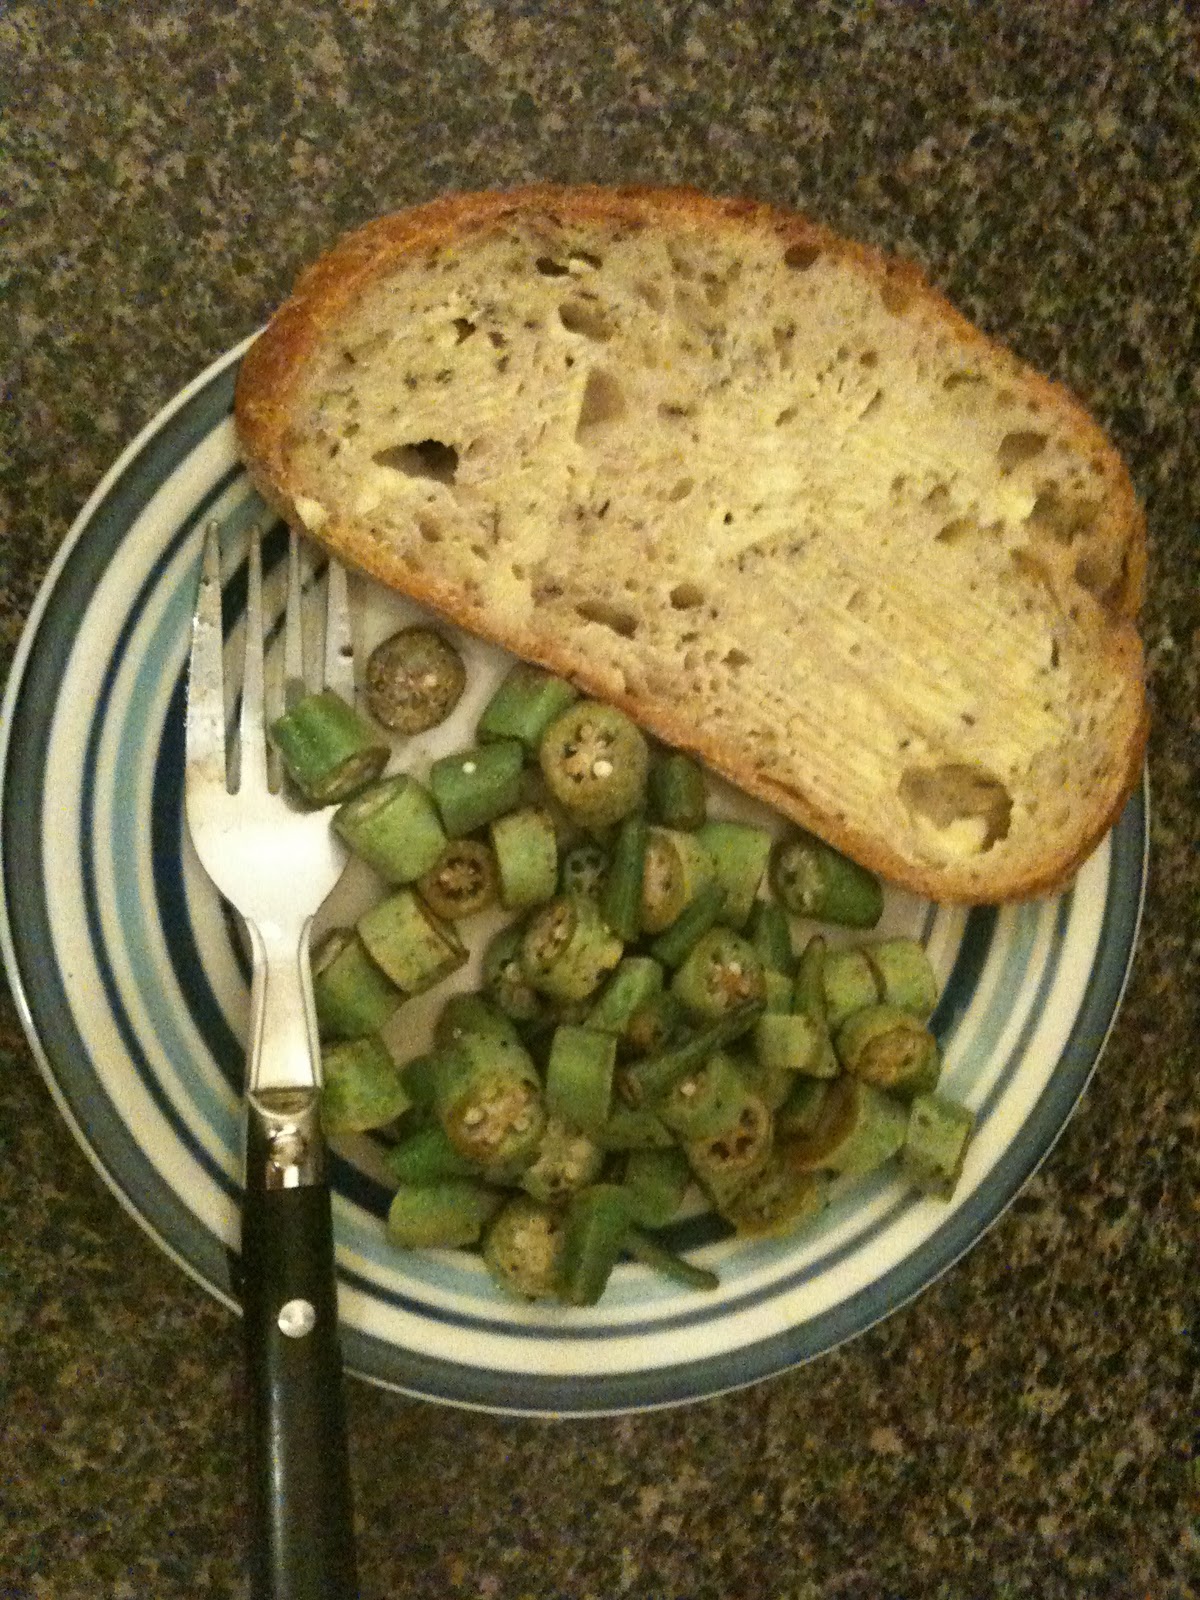
For my first cooking experience with okra, I decided to stick with something simple, so I pan-fried it. Basically I sliced it, covered it in olive oil, covered it in bread crumbs, and tossed the whole thing in the frying pan for a while.

Okay, so it wasn't exactly "covered" in bread crumbs, but you get the idea.
The final result was pretty good. Not amazing, but definitely edible. After I got tired of that, I still had quite a bit of okra left over, so I had to start getting creative. This is when I learned an incredibly important fact: You can put okra in just about anything. And so I did. Okra got put in salads. Okra got put in fajitas. Okra got put in chili. Okra has also made several appearances in my omelets. 

Okra, Tomato, and Feta Omelet. And also a bagel.

My adopted brother, Ben (who grew up in the South), told me the ONLY way to cook okra is to fry it in butter. I haven't yet tried this method, but it's on my list.

Perhaps the biggest complaint I hear about okra is how slimy it is, but there are ways to get around this. As noted in this blog, oil-based cooking works better than water-based cooking. I've also heard that cooking them whole works better than slicing them, but I haven't tried this technique yet. Overall, I would say my okra experience includes a mild slime, but it's not so bad. Probably my best results come from mixing it with a lot of other stuff, such as the omelets and fajitas. It blends pretty seamlessly, and therefore slime-lessly. Truth be told, I don't even notice it most of the time, and neither does my husband when I sneak it in his food.

 Eggplant has been more of a problem for me.

My first eggplant experiment was awesome. I made this eggplant burger and it was such an excellent meat substitute:

Mmm... cheesy.

Eggplant Burgers (from Simply in Season, p. 143)
2 tablespoons oil
2 teaspoons wine vinegar or balsamic vinegar
1 teaspoon Dijon mustard
1/4 teaspoon salt
1/4 teaspoon pepper

Whisk together in a small bowl. Cut 1 large eggplant into 1/4-inch thick slices to make 12-16 slices. Brush with oil mixture. Place on grill over medium-high heat. Close lid and cook, turning and brushing occasionally with remaining oil mixture, until tender, 5-10 minutes. Remove from grill. (Eggplant slices may be cooked under the broiler or sautéed in a fry pan until tender.

Simply in Season recommends adding cheese, tomatoes, red peppers, fresh basil leaves, etc. I just added the cheese, which was perfect.

After the excellent first attempt, I thought eggplant would be another successful venture. But I was wrong. Oh so wrong.

I tried a few other recipes and I just couldn't get them right. The eggplant always came out wet and chewy. It wasn't bad, but I just didn't like it very much, and it quickly became difficult finding ways to eat it. Here are some that I tried and maybe I'll try them again later and see if I have better luck.

Spicy Roasted Eggplant (from Simply in Season, p. 121)
1/2 cup fresh cilantro sprigs (chopped)
1/4 cup olive oil
2 tablespoons lemon juice
2 teaspoons ground cumin
1 teaspoon ground coriander
pinch of ground cinnamon

Stir together. Cut 1 large eggplant in 1/4-inch slices. Brush cilantro mixture on both sides of eggplant slices and transfer to greased baking pan. Broil eggplant 5-6 inches from heat until golden and cooked through, about 10 minutes. Salt and pepper to taste.

Results:

Meh.
Broiled Eggplant with Crunchy Parmesan Crust (From Farmer John's Cookbook, p. 177. I used their recipe for making my own mayonnaise, but I did a pretty bad job. I think it's one of those things you have to follow the directions closely, or else. Maybe I'll make/buy better mayo and this will turn out better next time. Also, you can never have too much cheese.)
Oil for greasing the baking sheet
mayonnaise
eggplant, cut into 1/4-inch slices
freshly grated Parmesan cheese (about 1/2 cup)

1. Preheat the broiler. Lightly oil a baking sheet.
2. Spread mayonnaise sparingly on both sides of each eggplant slice, then dip the slices in the grated Parmesan cheese, thoroughly coating both sides.
3. Arrange slices in a single layer on the oiled baking sheet and place under broiler until golden brown, about 3 minutes. Flip the slices and broil until golden brown and crunchy on top and the eggplant is soft, about 3 minutes more.

Result:
Served with pan-crusted tilapia, bread, and of course, fried okra
I really think the mayo was to blame for this one. I'm going to retry it later. And maybe make the mayo right this time.

Thursday, July 28, 2011

The Move

Well readers, in case you were unaware, I have moved to Houston. Hence my extended absence...again. But fear not, I have been busy cooking and eating up a storm! But first, I went shopping.

In order to get out of my fast food rut (it's not easy to eat healthy when all your food is boxed up and you're on the road, so no judgment!), I made a trip to the farmers market at Rice University. The market is every Tuesday afternoon and, I believe (*insert middle school girl squeals here*), it's year round!

I was a little afraid of what I would find there since Texas is a little less *ahem* tree-hugger than my previous community. I thought it might be difficult to find organic growers or humanely raised animal products. But I was pleasantly surprised to find that over half of the farms at the market were either certified organic or followed organic principles but were not certified. Even better was that each farm had a large banner proudly proclaiming their status, making my shopping much more efficient and less awkward.

In all seriousness, I hate walking up to a stand and not buying anything. I feel like a bitch when I just look and decide there isn't anything I want or the next vendor over is selling it cheaper. I really don't have the guts to walk up and ask about a farmer's growing practices and walk away if I don't approve, so I'm glad I don't have to do that.

While at the market the first time, I picked up some old favorites like tomatoes, green peppers, and eggs (though the egg lady offered me duck eggs as well...I may have to take her up on that later!), but I also got some hummus, some AMAZING feta cheese and some new things to try, including okra and eggplant (which I will blog about later). I also got some spare ribs and some beef stew meat.

Overall, I'm very satisfied with my new farmers market, and I'm excited to visit a different one this or next weekend, but I do have a few grumblings/complaints:

1. The market is kind of small, but I may find the weekend market larger and with more selection, so we'll see.
2. It's kind of expensive, but most of the food seems more expensive here, so I may just have to get used to it. I'm trying to buy less junk, so that should help my food budget a bit.
3. There are hardly any fruits for sale. Seriously, one or two stands had watermelon and one conventional stand had peaches. That was it. I am going through fruit withdrawal. But perhaps the weekend market will suffice my need for fruit as well, so we'll see and I'll report back.

I went to the market this week as well, and I skipped the okra and eggplant because I still had some leftover, but I picked up some local honey. Interesting fact: Honey helps fight allergies because you get a mild exposure to the local pollen through the honey, so it is especially important to buy local! (Note: I looked into this and the New York Times wrote about a study that disproves this theory, so this may not be true. The NYT said most pollen allergens are wind borne rather than insect borne, so you would not be getting exposed to the same kinds of pollens. HOWEVER, I found another article that suggests some pollens are both wind and insect borne, and if those are the pollens you're allergic to, then you would see improvements when eating local honey, so it may be worth investigating further...)

For the rest of my shopping needs, I was excited to find out there was a Whole Foods near my new home! Whole Foods is very similar to the co-op I used to shop at, but bigger and better! The produce section was probably twice as big, and they had a separate fish counter from the meat counter. The fish are MSC-certified and Whole Foods has a lot of control over their supply and their sources, making sure they are properly maintained. They had an even bigger selection of bread made in-house, and a huge wine selection that I have yet to check out.

I was delighted to see they had local milk in quart containers (that's really all I can drink before it goes bad) and I got this Peaches and Cream milk that was also local (and fabulous) in a quart container. I got some yummy rosemary sourdough bread, some catfish, gulf shrimp, lemons, sour cream, butter, spaghetti sauce, and some seasonings. But of course, it wasn't perfect:

1. They only had one kind of butter in a tub, and it was the exact same brand and type as they had at the co-op (which I hated). But I remedied this by putting one of my butter sticks (which I had several options to choose from) in my butter dish and left it out on the counter.
2. The wait was terrible. I had to wait ten minutes before someone could help me at the fish counter and about 15 minutes to get cashed out. It seems like they need to build another location so that half of the people will go somewhere else!

One random perk is that the co-op used to charge extra if you didn't bring your own bags but Whole Foods gives you a ten cent discount for every bag you bring, so I can lightly pack several bags and save even more...win!

I've made a couple random trips to the regular grocery stores for odds and ends (like s'mores ingredients) as well. Mostly I've gone to Kroger because it's closest, but I don't really like it. My husband really likes Albertson's and so he usually shops there (I'm addicted to their Yahtzee scratch cards). I've seen a few Fiestas around and I'm kind of scared to go in because they seem kind of... too focused to price and not on quality. I like H-E-B, it's probably the closest thing to my old grocery store, so once I find one nearby, I'll probably use it to find all those random things Whole Foods doesn't have.

PS: I'm blogging via phone because I dont have my Internet hooked up yet, so please excuse any spelling errors. They are hard to find on here, but I will go through and edit this later!

Thursday, June 23, 2011

Nudo Olive Oil

Waaay back in December, my husband adopted an olive tree for me from Nudo for Christmas. Nudo is an organic grove and they produce their oil in small batches at the nearby press to maintain their local, artisan flavor. They also send me monthly updates about the grove, along with recipes and other fun tidbits. The idea is that you adopt a specific tree in an Italian olive grove (They gave me a map of where my tree is located and if I so desire I can hug it and take my picture with it or whatever else) and come harvest time I get all the extra virgin olive oil from MY tree! Pretty cool, if I say so.

Well, harvest time came last month and I got four cute little tins of olive oil from my tree.

*Insert giddy noises here*
 
Unfortunately, I hadn't yet finished my bottles of olive oil I already had, so I had to wait until now to break one open.  I started my taste test with a little cracked pepper and dipped my pesto baguette from the farmers market in it.

Yum!

It was superb. The oil was so flavorful and lively, particularly because it was so fresh compared to what I buy at the store. The tins are supposed to help preserve the flavor and I could really taste the difference. Hopefully that will still be true three months from now when I get near the end. I'll also receive a package of flavored olive oils from their other groves in the fall, so I'll have about double what I got now altogether.
 
I was a little skeptical of the tins at first because I wasn't sure how they resealed once you opened them. But it turns out when you open it, a little spout pops up and the lid becomes a twist-on cap. It's perfect and incredibly cute. I will have to invite people over soon to try it out. Nudo recommends doing a side-by-side comparison of a store brand and I think that would be a lot of fun. Any takers?

Rhubarb

I have been having a hell of a time figuring out what to do with rhubarb. The first couple bundles I bought this season I ended up throwing away because they went bad before I figured out what to do with them. But I really wanted to do something with it, so I kept buying it. All of the recipes I came across called for unusual ingredients or complicated preparation and so I just wasn't interested. Finally, I pulled out my Simply in Season cookbook for some inspiration. I found the Roasted Rhubarb recipe (p. 74) and thought, Ahhhh perfect! Below is the recipe in the book:

4 cups rhubarb (chopped)
1/2 cup sugar
1/4 cup orange or lemon juice
2 tablespoons candied ginger or fresh ginger root (minced)
1 teaspoon orange or lemon peel (grated)

Combine in baking pan. Spread evenly and bake in preheated over at 450F until rhubarb is soft but retains its shape, about 25 minutes. Stir, cool slightly, and serve with ice cream or yogurt.

Okay, so this was actually far from perfect because I didn't have any candied ginger or fresh ginger root or fresh orange or lemon peel (remember all those unusual ingredients?!). And I definitely didn't have 4 cups of rhubarb either. But this was doable. So I tweaked it a little and made it work. Here is my modified recipe:

1 1/2ish cups rhubarb (chopped)
honey (enough to lightly coat rhubarb)
big splash of lemon juice
healthy sprinklings of ground ginger and lemon peel

Cook as stated above.

This was definitely a much smaller batch, so I may have over cooked it just a little, but it was still very good paired with some local vanilla yogurt. With the yogurt, it was just enough for two small servings.

So my next visit to the market, I decided to get some more rhubarb and try it again. I was at the Monday market (which is a lot smaller than the Wednesday market) and I saw some rhubarb and asked for a bundle of it. The farmer smiled sheepishly and informed me that I was looking at chard, not rhubarb. Oh, how embarrassing. Nobody had any rhubarb that day. The chard farmer said he almost brought some but decided against it at the last minute. Oh well.

I went to the market again last night and bought some legit rhubarb (and I can plainly see the difference between it and chard now). I also bought some strawberries, so I decided to tweak the recipe even more today. Here is my final version:

2ish cups chopped strawberries and rhubarb (I probably had 1/3 strawberries and 2/3 rhubarb, but a 50/50 ratio would be ideal)
honey (enough to lightly coat)
big splash of lemon juice
healthy sprinklings of ground ginger and lemon peel

Combine in baking pan. Then add the Better Homes and Gardens streusel topping from page 126:

In a small bowl stir together 3 tablespoons all-purpose flour, 3 tablespoons packed brown sugar, and 1/4 teaspoon ground cinnamon. Cut in 2 tablespoons butter until the mixture resembles course crumbs.

Sprinkle on top of strawberry rhubarb mixture (you could probably double the streusel recipe if desired) and bake at 450F for 18 minutes.

Pure Strawberry Rhubarb Heaven

Excellent on its own and probably even better with yogurt or ice cream, but I was out. I ate about half already, so I would say there are two servings without the dairy, three-to-four with it.
I'm pretty sure I have a new favorite summer dessert. Just saying...

Peas in a Pod

I recently bought some sugar snap peas at the farmers market. This was the first time I'd ever bought peas that were not pre-shucked, so I really had no idea what I was doing. I decided that I wasn't quite comfortable cooking them inside the pod yet, so I opted to shuck my small pile of peas and cook them like normal.

Half an hour later...
Talk about pathetic...

I brooded over my wimpy batch of peas next to the hulking pile of leftover pods. This isn't even one serving of peas, I thought. Nonetheless, I dumped my little mound into a pot of boiling water and prayed they would grow to a respectable size after absorbing some water.

Nope. Not really any bigger.

So apparently, these were not magic peas that would double in size with a little water. Despite this, I buttered and seasoned them up and ate them just the same. They were delicious, but there just wasn't much to them.

A few days later I found myself back at the market picking up another pint of peas, this time determined to cook and eat them in the pods. About a week later I bought some more peas and when I put them in the fridge, I realized I had not yet prepared or eaten the last batch I'd bought. So I immediately pulled the old batch out and got to work. Again, I wimped out and decided to shuck them, but these peas were a little more mature than the first batch (They'd gone through that whole 'potty joke phase' and were now discussing their college plans). As such, I had a much more reasonable portion of peas for an end result, but still only enough for about one person. Seeing as how I'm the only one eating these peas, this is probably for the best. I haven't yet made the most recent batch of peas, but something tells me I'm still going to shuck them.

I don't know what it is, but I just don't really have a fondness for eating pea pods...It's like eating an orange peel or something. I know I could cook them in a stir-fry and it would look perfectly normal, but I don't really care that much for stir-fry either. If anyone has any other great ideas for eating the pods, please share and I will try it out. Otherwise, I'm shucking them.

Monday, June 13, 2011

Kohlrabi

On one of my recent market visits, one of the farmers was selling kohlrabi for $1, so I figured I'd try it out. I've never had kohlrabi before, let alone made it, so this was going to be a new adventure for me.


I recently acquired a copy of Simply in Season, which is an excellent resource for all those unfamiliar fruits and veggies at the market. I looked up kohlrabi and it said to boil it for 30-35 minutes, then chop it up and serve with the typical vegetable fare (seasoning, butter, cheese, etc). So I did.

Is it just me or is it a little warm in here?
 
I boiled that ugly sucker for a good half hour, flipping it over halfway through so the stuff sticking out could be submerged too. And I think for most of the time I kept the lid on to try and steam it, or something. Then I pulled it out, cut it up into bite-size pieces, and added some melted butter, salt, and pepper.

Tada!


I was a little wary of this stuff. I took a bite of it while it was still raw and it sort of reminded me of raw broccoli (not my favorite). I'd never had it before so I really had no idea what to expect of the final product, so I took my first cooked and seasoned bite and my initial reaction was "This tastes just like corn."

I figured it was just because I season corn the exact same way, but after my husband tried it, he said the same thing. So I think kohlrabi is the hybrid baby of corn and broccoli, and honestly, it's pretty delicious. I haven't been back to the market to pick up some more yet, but it's definitely on my list.

One bulb is just right for two regular-sized servings or one main course-ish sized serving. This is perfect for me because my husband still won't eat very much, if any, so when I get stuck eating a big portion, I'll at least be able to eat all of it. But if he does decide to eat a little bit, then there's enough to share too.

Thursday, May 26, 2011

Farmers Market


Well, I’m back.
It’s been a busy couple of months, between making preparations for moving, my husband’s graduation, going on vacation, and working seemingly all the time. I lost some of my drive, but I’ve been kind of waiting for a few things to happen so I could write about them.
In particular, I’ve been anxiously awaiting the arrival of the Farmers Market, and it finally came at the beginning of the month. I’ve gone each week that I haven’t been working, doing graduation stuff, or out of town, which makes for three visits so far, and I’m planning for many more.
The city I live in is rather forward thinking when it comes to food, so the Farmers Market is a pretty big deal. There’s actually a market in different locations at least four days a week, possibly more. At the main one on Saturday mornings, there’s live music, demonstrations, and several stands along the perimeter selling food to eat while you shop. Last Saturday, I ate a fabulous omelet made with fresh, local ingredients sold at the market. It cost about as much as what we charge at the restaurant where I work (and, in my opinion, tastes about twice as delicious!). There are also several stands selling non-food items, such as pet treats, soaps, plants, and other crafty items. Overall, it’s a pretty fun event and quite crowded with fresh, local food lovers like me.
Yesterday, I took my husband with me to the market to pick up a few things. I usually don’t have a list in mind, I just look for new and interesting things and if I happen across some familiar favorites, I’ll grab those too. I knew I wanted some asparagus, but other than that, I had no idea what I was going to bring home.
When I go to the market, I usually like to make an initial loop around the stands to see what everyone is offering and for what price. Many of the stands also offer samples, so I’ll usually do my tasting during my first lap as well. After I’ve seen everything, I make one or two more laps to grab everything I want and usually find something else I didn’t see the first time.  Here are my finds for the week:
 Yum!
Starting at the top center and going clockwise I bought a bag of mixed spring greens ($3.00), a half loaf of bread ($3.50), strawberry peach jam ($6.00), asparagus ($1.75), a dozen eggs ($3.00), fancy bread [I can’t remember what kind, but the sample was delicious!] ($6.00), radishes ($1.00), and a quarter pound of smoked Gouda cheese ($5.00), for a grand total of $29.25.
I was ready to eat most of the food the second we left the market, but we’d already made dinner plans with my family so it had to wait until today. I started the morning off right with some delicious french toast using the half loaf of bread. I would have used the eggs but I had to finish off the eggs I’d bought at the co-op earlier this week. I ate it with butter and real maple syrup. 
 Below is my “recipe.”
½ loaf of bread (7-8 ½” slices)
4-6 eggs (depending on my mood)
milk (less than what I have in egg and in all likelihood inversely proportional to it)
vanilla (a few dabbles)
Mix the eggs, milk and vanilla. Soak the bread in the mixture and then grill on each side until it looks done.
Then for lunch, I decided to make the asparagus. I bought some the first time I visited the market this year because I wanted to try fresh asparagus (I’d only eaten it one other time and it was from the Cheesecake Factory). I had no idea how to prepare it—especially in a way my husband would eat it—so I asked the farmer if she had any suggestions. She said to sauté it with olive oil, balsamic vinegar, Italian seasoning and top it with parmesan cheese after it’s cooked.
 Easy and Delicious
It was fabulous. I got my husband to eat it, but he wasn’t a fan (everyone else loved it though, so it’s just him). I got him to eat another piece or two today, but lucky me got to eat the rest. His loss, I say.
Peanut butter and strawberry peach jam sandwiches accompanied our asparagus. I also ate some Garden Salsa Sun Chips with avocado ranch dip—which I purchased at the market previously and is quite possibly the best tasting dip, ever.
Tonight we’ll be making a salad with the mixed greens and radishes (and possibly the avocado ranch dip) and probably eating the fancy bread with it. I’ll update more on that after dinner.