Showing posts with label olive oil. Show all posts

Monday, June 4, 2012

Kale

Lately I've been very experimental at the Farmers Market. A couple weeks ago, I bought a bag of kale and was like, "I have no idea what to do with this, but I'll figure something out." The farmer recommended kale chips and a few other things, but didn't give me a recipe card, so I forgot half the things they told me I could do. Instead, I opted to check out my cookbooks for some inspiration. I realized that my Farmer John's Cookbook had not been getting the attention it deserved, so I started there and found a great recipe for Cajun Corn and Kale Salad (p. 226). Since I'd already bought a couple ears of corn, it seemed like a perfect way to go through my purchases. Below is my very modified version of this because I didn't have a lot of the ingredients, so I just adapted it to make it work.

2 ears sweet corn
as much kale as your heart desires
salt
1 sweet pepper
1 hot pepper
1 tomato
1 onion
1 clove garlic
leftover cucumber
olive oil
lemon juice
cayenne pepper
black pepper
ground mustard
thyme? (I don't remember if I had some, but the recipe called for it)

Bring large pot of water to boil. Add corn ears. Turn off heat and let sit for about 5 minutes. Pull out corn to cool and remove kernels from cob.
Re-heat water and add kale with a sprinkling of salt. Cook for about 5 minutes. Strain and cool. Remove excess liquid and finely chop.
Cut up other ingredients and mix everything together. Season with additional salt.

 Behold, sweet deliciousness.

I added a lot of cayenne pepper, so it was pretty spicy, but I absolutely loved it! I took it to my neighbors' place, who were serving Korean food for dinner that night. Normally I wouldn't think Cajun-style salad would go with Korean food, but they were making spicy food so it actually complemented everything quite well. It really was a great summer salad that can add a refreshing taste to just about anything. I'm really excited to make it again.

I also made some kale chips using a pretty basic recipe.

kale
olive oil
sea salt
pepper
lemon juice
additional flavors/spices, if you're so inclined

Wash kale and cut into bite-sized pieces. Sprinkle with additional ingredients on a cookie sheet. Bake at 275°F for about 20 minutes or until crisp, turning once halfway through.

Crispy Little Kale Bits
 
So the first thing you need to know about kale chips is that they are pretty gross if they aren't completely dry and crisp. But if they're done, they're alright. There's not much to brag about, but kale is so good for you, I don't really mind eating it this way to get the nutrients out of it.

I haven't been as good about making smoothies lately, but I think once I get myself back on board, I would like to try adding a little bit of kale to them. It doesn't really taste like much and seems to blend in pretty well, so that's my next step I think.

Tuesday, February 14, 2012

Creamy Pesto

My new favorite meal is pasta with creamy pesto sauce, which I made on a creative whim the other day. I recently read Kitchen Counter Cooking School, which I'll review later, but one of the chapters talked about how inexpensive and easy it is to make pasta sauce, so I've been making lots of pasta sauce lately. In particular, I've been making lots of Alfredo sauce. Between Kitchen Counter Cooking School and Better Homes and Gardens, this is roughly my recipe:

1 clove garlic (chopped)
Olive oil
1 cup heavy whipping cream
Parmesan cheese
Salt
Pepper
Pasta water (optional)

Sauté garlic in olive oil in small sauce pan over medium heat. Add heavy whipping cream and stir occasionally. When sauce thickens to point where you can scrape with spoon and see bottom of the pan, add pasta water if you need more sauce and boil down to same thickness. If not, add Parmesan cheese, salt, and pepper. And voilà! Alfredo sauce.

I've also been making pesto with roughly this recipe: 

Basil
Parsley
Olive oil
Pine nuts

Mix together in food processor or Magic Bullet until it looks like pesto. You can also add garlic and Parmesan cheese.


One thing I've learned is that you can spoon portions of fresh pesto into ice cube trays and freeze them for later use, which has been very handy since it's pretty much impossible to make one serving.

So one day, I was making pasta and couldn't decide if I wanted to use my frozen pesto or my heavy whipping cream before it went bad. And that's when I said, "Why don't I just mix them together?"

 Best. Idea. Ever.

So basically I made my Alfredo sauce and then dropped a pesto cube into the pot and let it melt as I mixed it. Then I poured it over my pasta and it was perfect. The only downside is that I seem to be an expert at making exactly one serving too many and the Alfredo sauce tends to separate when I put it in the fridge. It still tastes fine but it's not the same as when it's fresh.

Friday, February 10, 2012

Comeback Kid

So I fell off the blog-wagon. But I'm making a comeback. Starting now. Because I have pink eye and would rather relax and do something fun than be productive.

So anyway, since I am feeling like garbage, I thought a little soup might cheer me up. I bought a bunch of vegetables the other day and needed to get rid of them, so soup sounded like a good answer. I didn't really have a good recipe to follow, so I just sort of made one up:

Minestrone-ish:

Olive oil
1 clove garlic
1/4 red onion
1 bell pepper (I used yellow, but any will probably do)
1 Roma tomato
1 cup vegetable broth
1/3 cup Ditalini noodles (or bowtie or penne or whatever)
Parsley
Sea salt
Pepper

Sauté minced garlic clove in a small saucepan with olive oil over medium heat. Dice onion, bell pepper, and tomato and add to sauce pan. Once the tomato gets all soft and mushy, add the vegetable broth and bring to a boil. Add dry noodles and cook until done. Add parsley, sea salt, and pepper to taste.

And you end up with this. Sweet deliciousness.

This recipe made about two servings, but I'm probably gonna go back for that second serving right about now because it was all kinds of yummy and made me feel a little better on this dreary sick day. 

Friday, September 23, 2011

Leftovers

Let me just preface this whole post with something. Generally speaking, I hate leftovers. There are a few exceptions to this rule (lasagna), but for the most part, I'm pretty sick of eating something after one or two days in a row. Furthermore, my husband is not really any better, which is apparently weird.

One time, a few years back, I was at my (male) friend's parents' house and I was trying to make room for the food that was going to be dinner that night, and with three teenage boys living at home, there wasn't much room left. So I threw away my friend's leftovers from the day before thinking, Who's gonna eat these leftovers when we have all this fresh food that needs to be eaten? And that's when I found out that you're apparently not supposed to touch a man's leftovers. Ever. Unless they're my husband's leftovers. You can throw those away because he's not gonna eat them unless I make it happen.

That being said, I'm trying to do three things in regards to leftovers:

1. Figure out how to make things in smaller portions.

2. Re-invent my leftovers to take on a new form.

3. Freeze everything else.


I've successfully made a few things with smaller portions. My best accomplishment to date, is making mini-lasagna. My original recipe is for a 9x13 pan, but my husband and I could barely finish it. I would usually eat three or four big pieces and make him eat at least three (He is not as big of a fan of these leftovers as I am). So we cut it down to a 9x9 pan, which makes about 5 servings, which is just enough for the two of us. More recently though, I made lasagna for myself is an 8x6 which was just right with about three servings. I've also made a single serving eggplant burger, chicken, and a few other things. My biggest problem tends to be anything with eggs or yeast, because you can't really include half an egg or half a yeast packet, can you?

Going along with making smaller portions, I've also been working on purchasing smaller portions. Sometimes when I'm at the farmer's market, I'll see these huge baskets of tomatoes or okra or strawberries or whatever, and I know there's no way I'd be able to finish the whole basket. Some of the farmers have been kind enough to offer me a half-portion or allow me to buy the amount I need. I had a really nice farmer at one market that was selling a big basket of tomatoes for $4. I told him I really only needed one or two, so he gave me two "ugly" tomatoes for $1. Another farmer was selling quarts of strawberries and I didn't think I could use that much, so she offered me a pint for half the price.

My other problem area is meats. I feel silly asking for only half a pound of ground beef, but when I'm only making food for one or two, that's really all I need. So I've been brave and asked for the amount I need.

My other other problem area is restaurant leftovers. I never seem to eat them after we leave the restaurant. Why I ask them to box them up is beyond me, but I do it. In order to prevent this whole predicament, I usually try to get my husband to share something with me. Unfortunately, we often have different tastes or he's "really hungry" and won't want to share. Last time we compromised and I got a small dish (quesadilla appetizer) and he got a big dish that I also wanted (burrito) and we split them.

Reinventing has been my most successful endeavor, I think. It is especially good with leftover meat dishes from restaurants. My leftover steak from Benjy's? I put it in my omelet the next day. My leftovers from the Vietnamese place? Omelet. My leftovers from my fajitas? Stir-fry, though they might've made a nice omelet too, I don't know. I put leftover chicken on salads. Leftover ribs can become pulled pork sandwiches. The list goes on. My biggest problem is just not knowing how to make it different from what I was already eating, but throwing stuff in my omelets seems to work pretty well as a fallback plan for now.

Freezing things has also worked pretty well. I already freeze my pizza dough because it makes enough for two large pizzas, but now I've started freezing it in smaller portions and I make mini-pizzas. I've also been making batches of pancakes and freezing whatever I don't eat. This has been the best thing ever because it makes making breakfast so easy. I just pop a couple in the microwave and BAM! Breakfast is served.

I added banana slices one time but I don't think they froze as well. They were excellent fresh though!

Whole Wheat Pancakes (From Better Homes and Gardens, p. 137)
1 3/4 cups whole wheat flour
2 tablespoons packed brown sugar
1 tablespoon baking powder
1/4 teaspoon salt
1 egg, slightly beaten
1 1/2 cups milk
3 tablespoons cooking oil

1. In a large bowl stir together flour, sugar, baking powder, and salt. In another bowl use a fork to combine egg, milk, and oil. Add egg mixture all at once to flour mixture. Stir just until moistened (batter should be slightly lumpy). If desired, stir in desired fruit.

2. For each standard-size pancake, pour about 1/4 cup batter onto a hot, lightly greased griddle or heavy skillet, spreading batter if necessary. For dollar-size pancakes, use about 1 tablespoon batter. Cook over medium heat for 1 to 2 minutes on each side or until pancakes are golden brown, turning to second side when pancakes have bubbly surfaces and edges are slightly dry. Serve warm. If desired, top with syrup.

Meatballs was another very freezable meal. I can add a few to spaghetti, make meatball subs, or just eat them by themselves. What I really like is that I can put all of them in one freezer bag and pull out just what I need.

 Open-Faced Meatball Sandwich

Meatballs (from The Newlywed Cookbook, p. 72)

1 pound lean ground beef
1 small onion, diced (about 1/2 cup)
1/4 cup Italian-style dry bread crumbs
1 egg
2 tablespoons chopped fresh Italian parsley (or just regular, dried parsley, or Italian seasoning)
1/2 teaspoon salt
1/4 teaspoon ground black pepper
2 teaspoons olive oil

1. In a large bowl, combine beef, onion, bread crumbs, egg, parsley, salt, and pepper. Mix well with your hands and form mixture into 16 2-inch meatballs.
2. Heat oil in a large non-stick skillet over medium heat. Add meatballs and sauté 5-7 minutes, or until browned on sides.

Top with marinara, cheese, etc. Same goes for the leftovers. Just dump whatever you want on them and throw them in the microwave.

Okra and Eggplant

Hello, blogosphere. It's been a while. Here's a quick update on my non-foodie life: I've been working a lot. And I started school again in August. So I've had zero time for blogging. BUT! I have had time for cooking. And eating. Which we will discuss. Today.

So as I mentioned in my previous entry, I decided to experiment with the okra and eggplant that I bought at the farmer's market. I've eaten okra a few times prior to this, but I'd never cooked it on my own. Eggplant, on the other hand, was completely foreign to me. And so, my adventure began.

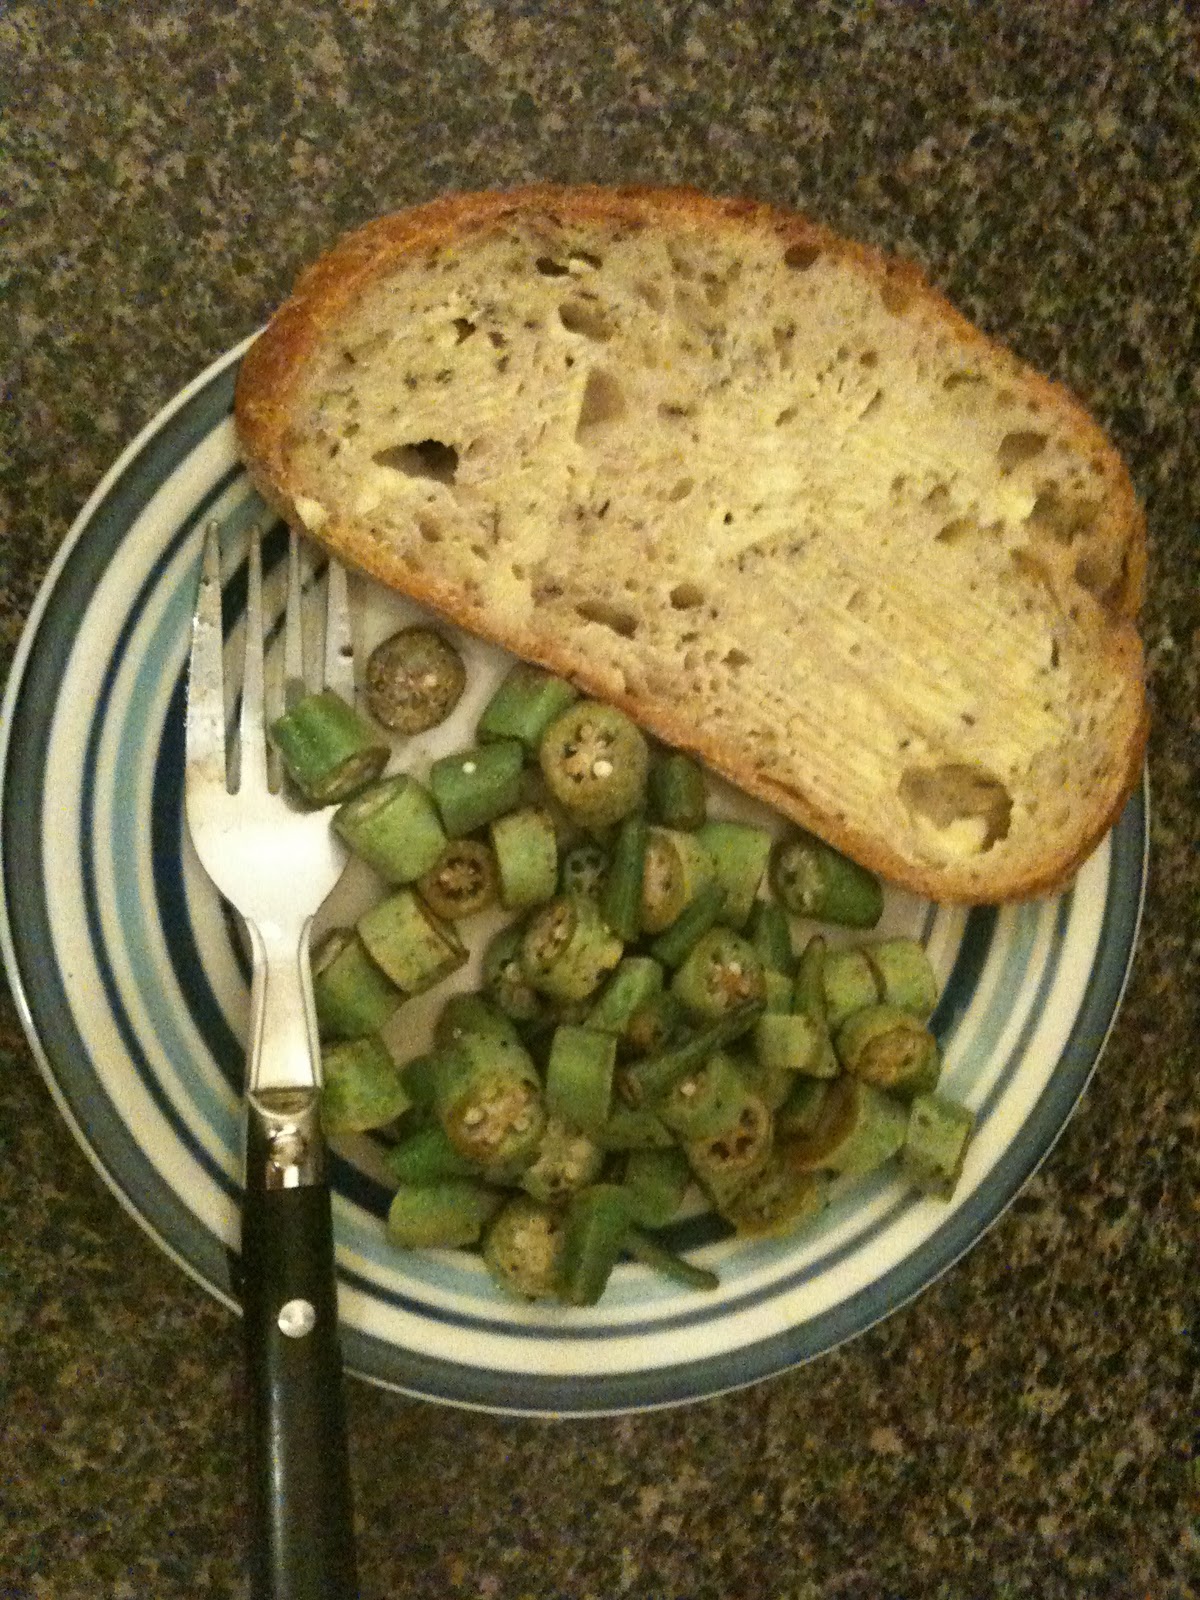
For my first cooking experience with okra, I decided to stick with something simple, so I pan-fried it. Basically I sliced it, covered it in olive oil, covered it in bread crumbs, and tossed the whole thing in the frying pan for a while.

Okay, so it wasn't exactly "covered" in bread crumbs, but you get the idea.
The final result was pretty good. Not amazing, but definitely edible. After I got tired of that, I still had quite a bit of okra left over, so I had to start getting creative. This is when I learned an incredibly important fact: You can put okra in just about anything. And so I did. Okra got put in salads. Okra got put in fajitas. Okra got put in chili. Okra has also made several appearances in my omelets. 

Okra, Tomato, and Feta Omelet. And also a bagel.

My adopted brother, Ben (who grew up in the South), told me the ONLY way to cook okra is to fry it in butter. I haven't yet tried this method, but it's on my list.

Perhaps the biggest complaint I hear about okra is how slimy it is, but there are ways to get around this. As noted in this blog, oil-based cooking works better than water-based cooking. I've also heard that cooking them whole works better than slicing them, but I haven't tried this technique yet. Overall, I would say my okra experience includes a mild slime, but it's not so bad. Probably my best results come from mixing it with a lot of other stuff, such as the omelets and fajitas. It blends pretty seamlessly, and therefore slime-lessly. Truth be told, I don't even notice it most of the time, and neither does my husband when I sneak it in his food.

 Eggplant has been more of a problem for me.

My first eggplant experiment was awesome. I made this eggplant burger and it was such an excellent meat substitute:

Mmm... cheesy.

Eggplant Burgers (from Simply in Season, p. 143)
2 tablespoons oil
2 teaspoons wine vinegar or balsamic vinegar
1 teaspoon Dijon mustard
1/4 teaspoon salt
1/4 teaspoon pepper

Whisk together in a small bowl. Cut 1 large eggplant into 1/4-inch thick slices to make 12-16 slices. Brush with oil mixture. Place on grill over medium-high heat. Close lid and cook, turning and brushing occasionally with remaining oil mixture, until tender, 5-10 minutes. Remove from grill. (Eggplant slices may be cooked under the broiler or sautéed in a fry pan until tender.

Simply in Season recommends adding cheese, tomatoes, red peppers, fresh basil leaves, etc. I just added the cheese, which was perfect.

After the excellent first attempt, I thought eggplant would be another successful venture. But I was wrong. Oh so wrong.

I tried a few other recipes and I just couldn't get them right. The eggplant always came out wet and chewy. It wasn't bad, but I just didn't like it very much, and it quickly became difficult finding ways to eat it. Here are some that I tried and maybe I'll try them again later and see if I have better luck.

Spicy Roasted Eggplant (from Simply in Season, p. 121)
1/2 cup fresh cilantro sprigs (chopped)
1/4 cup olive oil
2 tablespoons lemon juice
2 teaspoons ground cumin
1 teaspoon ground coriander
pinch of ground cinnamon

Stir together. Cut 1 large eggplant in 1/4-inch slices. Brush cilantro mixture on both sides of eggplant slices and transfer to greased baking pan. Broil eggplant 5-6 inches from heat until golden and cooked through, about 10 minutes. Salt and pepper to taste.

Results:

Meh.
Broiled Eggplant with Crunchy Parmesan Crust (From Farmer John's Cookbook, p. 177. I used their recipe for making my own mayonnaise, but I did a pretty bad job. I think it's one of those things you have to follow the directions closely, or else. Maybe I'll make/buy better mayo and this will turn out better next time. Also, you can never have too much cheese.)
Oil for greasing the baking sheet
mayonnaise
eggplant, cut into 1/4-inch slices
freshly grated Parmesan cheese (about 1/2 cup)

1. Preheat the broiler. Lightly oil a baking sheet.
2. Spread mayonnaise sparingly on both sides of each eggplant slice, then dip the slices in the grated Parmesan cheese, thoroughly coating both sides.
3. Arrange slices in a single layer on the oiled baking sheet and place under broiler until golden brown, about 3 minutes. Flip the slices and broil until golden brown and crunchy on top and the eggplant is soft, about 3 minutes more.

Result:
Served with pan-crusted tilapia, bread, and of course, fried okra
I really think the mayo was to blame for this one. I'm going to retry it later. And maybe make the mayo right this time.

Thursday, June 23, 2011

Nudo Olive Oil

Waaay back in December, my husband adopted an olive tree for me from Nudo for Christmas. Nudo is an organic grove and they produce their oil in small batches at the nearby press to maintain their local, artisan flavor. They also send me monthly updates about the grove, along with recipes and other fun tidbits. The idea is that you adopt a specific tree in an Italian olive grove (They gave me a map of where my tree is located and if I so desire I can hug it and take my picture with it or whatever else) and come harvest time I get all the extra virgin olive oil from MY tree! Pretty cool, if I say so.

Well, harvest time came last month and I got four cute little tins of olive oil from my tree.

*Insert giddy noises here*
 
Unfortunately, I hadn't yet finished my bottles of olive oil I already had, so I had to wait until now to break one open.  I started my taste test with a little cracked pepper and dipped my pesto baguette from the farmers market in it.

Yum!

It was superb. The oil was so flavorful and lively, particularly because it was so fresh compared to what I buy at the store. The tins are supposed to help preserve the flavor and I could really taste the difference. Hopefully that will still be true three months from now when I get near the end. I'll also receive a package of flavored olive oils from their other groves in the fall, so I'll have about double what I got now altogether.
 
I was a little skeptical of the tins at first because I wasn't sure how they resealed once you opened them. But it turns out when you open it, a little spout pops up and the lid becomes a twist-on cap. It's perfect and incredibly cute. I will have to invite people over soon to try it out. Nudo recommends doing a side-by-side comparison of a store brand and I think that would be a lot of fun. Any takers?

Thursday, May 26, 2011

Farmers Market


Well, I’m back.
It’s been a busy couple of months, between making preparations for moving, my husband’s graduation, going on vacation, and working seemingly all the time. I lost some of my drive, but I’ve been kind of waiting for a few things to happen so I could write about them.
In particular, I’ve been anxiously awaiting the arrival of the Farmers Market, and it finally came at the beginning of the month. I’ve gone each week that I haven’t been working, doing graduation stuff, or out of town, which makes for three visits so far, and I’m planning for many more.
The city I live in is rather forward thinking when it comes to food, so the Farmers Market is a pretty big deal. There’s actually a market in different locations at least four days a week, possibly more. At the main one on Saturday mornings, there’s live music, demonstrations, and several stands along the perimeter selling food to eat while you shop. Last Saturday, I ate a fabulous omelet made with fresh, local ingredients sold at the market. It cost about as much as what we charge at the restaurant where I work (and, in my opinion, tastes about twice as delicious!). There are also several stands selling non-food items, such as pet treats, soaps, plants, and other crafty items. Overall, it’s a pretty fun event and quite crowded with fresh, local food lovers like me.
Yesterday, I took my husband with me to the market to pick up a few things. I usually don’t have a list in mind, I just look for new and interesting things and if I happen across some familiar favorites, I’ll grab those too. I knew I wanted some asparagus, but other than that, I had no idea what I was going to bring home.
When I go to the market, I usually like to make an initial loop around the stands to see what everyone is offering and for what price. Many of the stands also offer samples, so I’ll usually do my tasting during my first lap as well. After I’ve seen everything, I make one or two more laps to grab everything I want and usually find something else I didn’t see the first time.  Here are my finds for the week:
 Yum!
Starting at the top center and going clockwise I bought a bag of mixed spring greens ($3.00), a half loaf of bread ($3.50), strawberry peach jam ($6.00), asparagus ($1.75), a dozen eggs ($3.00), fancy bread [I can’t remember what kind, but the sample was delicious!] ($6.00), radishes ($1.00), and a quarter pound of smoked Gouda cheese ($5.00), for a grand total of $29.25.
I was ready to eat most of the food the second we left the market, but we’d already made dinner plans with my family so it had to wait until today. I started the morning off right with some delicious french toast using the half loaf of bread. I would have used the eggs but I had to finish off the eggs I’d bought at the co-op earlier this week. I ate it with butter and real maple syrup. 
 Below is my “recipe.”
½ loaf of bread (7-8 ½” slices)
4-6 eggs (depending on my mood)
milk (less than what I have in egg and in all likelihood inversely proportional to it)
vanilla (a few dabbles)
Mix the eggs, milk and vanilla. Soak the bread in the mixture and then grill on each side until it looks done.
Then for lunch, I decided to make the asparagus. I bought some the first time I visited the market this year because I wanted to try fresh asparagus (I’d only eaten it one other time and it was from the Cheesecake Factory). I had no idea how to prepare it—especially in a way my husband would eat it—so I asked the farmer if she had any suggestions. She said to sauté it with olive oil, balsamic vinegar, Italian seasoning and top it with parmesan cheese after it’s cooked.
 Easy and Delicious
It was fabulous. I got my husband to eat it, but he wasn’t a fan (everyone else loved it though, so it’s just him). I got him to eat another piece or two today, but lucky me got to eat the rest. His loss, I say.
Peanut butter and strawberry peach jam sandwiches accompanied our asparagus. I also ate some Garden Salsa Sun Chips with avocado ranch dip—which I purchased at the market previously and is quite possibly the best tasting dip, ever.
Tonight we’ll be making a salad with the mixed greens and radishes (and possibly the avocado ranch dip) and probably eating the fancy bread with it. I’ll update more on that after dinner.

Thursday, March 24, 2011

New Recipe #1: Jumbo Shrimp with Chilies

So for my new recipe this week, I made Jumbo Shrimp with Chilies, although somewhat modified from the original. I got the original in a newsletter from Nudo (which I will blog about soon!) Here is basically how I made it:

1/2 lb. of shrimp (just enough for me by itself, probably enough for two if served with pasta, etc.)
Spicy salsa (a co-worker gave me a batch of homemade salsa because it was too spicy for her. I used probably two tablespoons)
Olive oil (probably about 5 tablespoons)
Salt (a sprinkle)
Grappa (Grappa is a grape brandy, I used about 4 tablespoons after a lackluster first attempt)

Mix salsa, olive oil, and salt. Add shrimp and mix well. Sauté in skillet for 10-ish minutes in an attempt to boil out some of the liquid (or next time just don't use so much). Add grappa, set on fire.

Awesome.

After flames subside, put in a bowl and eat. The result was a little on the spicy side, but not too much. I mostly focused on the exceptionally delicious part. I think this would be great over pasta, and it was my original intention to do so, but I got off work late and didn't want to mess with it. Also, I'm tempted to try out the recipe with my mango salsa as well. So many options and I'm so excited for all of them.

Yeast, Hot Cross Buns, Homemade Pizza

I finally got the ingredients together to make my great grandmother's hot cross buns. I had never made anything that used yeast before or anything that needed to rise before I made it, so I was pretty intimidated by this less-than-helpful recipe. Nonetheless, I am never one to let fear stand in the way of my cooking adventures, so I bought a couple yeast packets and went to work.

Lucky for me, my Better Homes and Gardens Cookbook also has a recipe for hot cross buns (p. 157), so I pretty much followed the entire second half of that recipe as a guide for the missing half of my great grandmother's. Interestingly, the Better Homes and Gardens recipe started with "These slightly sweet rolls often are served during the Easter season," which made me realize that they are actually hot CROSS (as in Jesus) buns. More information about traditional hot cross buns can be found here.

Anyway, here is my modified recipe all in one piece:

1 c. scalded milk
1/2 c. sugar
1/4 c. butter
1/3 tsp. salt

Combine above and cool to lukewarm. Mix 1 tsp. sugar with 1 yeast cake, dissolve in 2 Tbsp. warm water. Add to above mixture, then add:

1 beaten egg
1/2 c. raisins
1 tsp. cinnamon
1/4 tsp. allspice
3 1/2 to 4 c. flour

Turn dough out onto a lightly floured surface. Knead in enough remaining flour to make a moderately soft dough (3 to 5 minutes total). Shape into a ball. Place in a lightly greased bowl, turning once to grease surface of dough. Cover; let rise in a warm place until double in size (about 2 hours).

Punch dough down. Turn dough out onto lightly floured surface. Cover; let rest 10 minutes. Meanwhile, lightly grease two baking sheets; set aside. Divide dough into 20 pieces. Gently pull each piece into a ball, tucking edges under to make smooth tops. Place balls 1 1/2 inches apart on prepared baking sheets. Cover; let rise until nearly double in size (about 1 hour).

Preheat oven to 375°F. Using a sharp knife, make crisscross slashes across the top of each dough ball. Brush egg whites over rolls. Bake about 15 minutes or until golden brown. Immediately remove buns from baking sheets. Cool slightly on wire racks.

Tada!

Not gonna lie, this is pretty much what you would get if you made cinnamon raisin bread into buns, but they are delicious (particularly when they're fresh from the oven). Also, yeast is not that bad to work with (other than the smell...). I took the remainder of my batch to work the next morning where they were quickly gobbled up.

But before that, I decided to use my remaining yeast packet to try out Better Homes and Gardens' homemade pizza recipe (p. 150):

2 1/2 to 3 cups all-purpose flour
1 packet active dry yeast
1/2 teaspoon of salt
1 cup warm water (120°F to 130°F)
2 tablespoons olive oil

In a large mixing bowl combine 1 1/4 cups of the flour, the yeast, and salt; add warm water and oil. Beat with an electric mixer on low speed for 30 seconds, scraping bowl. Beat on high speed for 3 minutes. Using a wooden spoon, stir in as much of the remaining flour as you can.

Turn dough out onto a lightly floured surface. Knead in enough remaining flour to make a moderately stiff dough that is smooth and elastic (6 to 8 minutes total). Divide dough in half. Cover; let rest for 10 minutes.

Preheat oven to 425°F. Grease two 12-inch pizza pans or large baking sheets. If desired, sprinkle with cornmeal. On a lightly floured surface, roll each dough half into a 13-inch circle. Transfer dough circles to prepared pans. Build up edges slightly; prick dough with a fork. Do not let rise. Bake about 10 minutes or until light brown. Spread pizza sauce onto hot crusts and top with desired meat (pepperoni), vegetables (skip), and cheese (smoked mozzarella). Bake about 10 minutes more or until bubbly. Cut each pizza into eight wedges. Makes 8 servings (2 wedges). 

NOTE: You can take half the dough and freeze it to use later and just make one pizza.

Now, this recipe was ridiculously easy and I didn't get a picture because I gobbled up that pizza so fast there was none left to photograph. This happened both times I made it. It was that delicious.

Also on the subject of breads, the co-op was having a sale on extra-ripe bananas, so I decided to remake my banana bread. This time, I baked it at 325°F for about 80 minutes and it came out perfectly. So, now we know.

Also, after much thought, I've decided to retire my goal of cooking one thing out of my grandmother's cookbooks each week. The main reason being that upon further inspection, they were not the best cookbook choices for this experiment. The PTA cookbook and my grandmother's handwritten cookbook were almost nothing but desserts, the omelets and crepes book was just omelets and crepes (and all of them had too many weird ingredients), the Pomeranian cookbook was hardly Pomeranian at all, and my Julia Child manual was more a lesson in how to cook than what to cook (and, quite honestly, I seem to do better developing my own style of how to cook than listening to Julia, or anyone else for that matter). Also, I'll be moving for school in the next couple months, so I'll probably have to give the cookbooks back to Grandpa before long anyway.

I think, in the stead of this goal, I'll make a new goal to make one new recipe each week, regardless of its origin. The point of the previous goal was to make healthier food, and I can better make that point if I have more sources available to me.

Monday, March 7, 2011

Animal, Vegetable, Miracle

I finally finished reading Barbara Kingsolver's book, Animal, Vegetable, Miracle this morning. I thoroughly enjoyed it and it brought to my attention a lot of food issues that I hadn't thought of before, but there was one thing that just didn't rub me the right way.

The premise of the book is that Kingsolver and her family decide to eat nothing but local food for an entire year, but they seem to break the rules every chance they get! They start off immediately breaking the rules by allowing for several exceptions right off the bat. They are allowed to eat grains and olive oil based on the simple fact that those things just aren't available locally. Okay, I said to myself, those are kind of necessities and if there's no way to get those locally, it's at least a step in the right direction. Then, on top of that, each family member got one "freebie" food: coffee, dried fruit, hot chocolate, and spices. Alright, I'll let that slide too. In fairness, they were buying those things from farmers who got fair wages and practiced sustainable agriculture, which is also important, and everyone needs a treat now and then.

But then they went on not one, but two multi-week vacations over the course of the year. And yes, they ate local foods from their vacation sites, sometimes, but not always. And they ate at friends' houses who didn't follow their locavore lifestyle and even ate out at restaurants that didn't serve local food on occasion.

Now don't get me wrong. Kingsolver and her family did a much better job of eating local, sustainable, and organic food than I do and probably better than I ever will. They grew a huge garden and raised their own animals and bought plenty of food from local farmers. And the vast majority of their food was local. But the thing here is that this was hardly a change for them. They already ate out of their garden previously and bought lots of food from the farmer's market and made an effort to eat local whenever possible. My point is, how is this any different than what they already did? They stepped it up a notch, but they really didn't go all the way, as the book promised in the beginning.

That being said, Kingsolver did an excellent job of making me appreciate and understand the importance of purchasing local food. I already knew it was important because you put money back into your local economy and it's fresher and all that. But one thing I never really thought about was all of the fossil fuels it takes to get food from all over the world to the grocery store. If we ate locally grown food instead, the fuel cost would be practically non-existent. Even doing something as simple as buying fruits and vegetables at the farmer's market instead of the grocery store would make a huge difference.

One other thing I really liked about the book was the inclusion of so many recipes they used to make locally produced breakfasts, lunches, and dinners. Once spring starts to roll around, I'll have to try to make some of these when the produce is in season.

I also appreciated the alternating format of the book. Most of the story is told through Kingsolver, but her older daughter, Camille, had an essay related to Kingsolver's story at the end of most chapters. And Kingsolver's husband, Steven Hopp, interjected with relevant facts and statistics throughout the narrative as well. The writing is charming, witty, and endearing. I could feel the happiness, worry, pride, and panic in Kingsolver's words, and her passion fueled my desire to eat better. I think the next book I'll work on is Marion Nestle's Food Politics. Michael Pollan referenced this one several times in his works, so it's likely awesome.

On that note, I went to the co-op grocery store today and picked up a few more local items than usual. After I went through nearly two dozen eggs last week, I snatched up a carton of my usual cage-free organic eggs. But just as I was about to walk away, I saw a row of plain egg cartons and all that was stamped on them was the name of the farm and the city where they farmed. My city. Without a second thought, I checked the local eggs for cracks and put back my usual eggs. I also found a brand of cottage cheese made on a farm only 20 miles from where I live, so I grabbed some to make lasagna this week. I also got another whole chicken from a local farm, and I bought bread baked at the co-op rather than baked elsewhere and then shipped to the co-op, so it saved a little gas there.

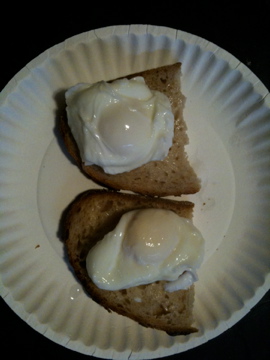
Also, one of my cooks at work read about my poached egg fiasco and gave me a little pep talk (re: made fun of me). So I watched him poach a couple eggs this weekend, and retried poaching eggs on Saturday afternoon. Here are my results:

Much better!

Basically, my problem was that I was trying to keep all the white intact, when really only the inner whites need to cook with the yolk and the rest just melt away. So pretty much all you have to do is drop the egg in the water and don't touch it til it's done. Sorry Julia, but you made that way more complicated than necessary.

Eggs Benedict with Paprika

Thursday, March 3, 2011

This Week's Cooking Failures and Triumphs

I'm not sure if this will be any kind of weekly segment, but probably something I will do every now and then. I had a couple epic moments in the kitchen this week and I think they need to be shared, so that everyone can behold my incredible feats and my egregious defeats.

First, the bad. As I mentioned in my last post, my husband had a little accident when we last made red velvet cake, and ended up dropping half the batter on the floor. Here is the story:

We made the batter together and then I made plans with my sister. So once the batter was made, my husband was supposed to put the cakes in the oven and we'd make the frosting and frost the cakes after I got back. As I'm about to step out the door, I hear the two dreaded sounds no one wants to hear come from the kitchen: *CLUNK* and *insert string of profanities here*

I step back in to find a huge glob of red batter in the middle of the floor. My husband had been wiping the edge of the pan where we'd spilled some batter. While doing so, he had accidentally moved the pan to the edge of the table and when he let go, it tipped over to its doom.

From my perspective, I had left him alone for one minute in the kitchen and disaster struck, and out of sheer shock I said a few things that I probably shouldn't have. I left the house before more unwarranted comments escaped my fiery lips.

Then my comeuppance came. On Monday, I was under the weather but made plans to go to my internship anyway around 1 PM. Before that I decided to go to the grocery store because we were getting low on the essentials. When I got back and began putting things away, I realized that we still had the ingredients for mango salsa and it needed to get made sooner rather than later. I looked at the clock (it was about noon) and decided I had enough time to make it before my internship and then I could pack it for lunch to take to work after my internship. So I pulled out the ingredients and began making it. To get an idea, here is the recipe (however, I was making somewhere between 1.5 and 2 batches at the time):

1 medium mango, seeded, peeled, and diced
2 Hatch chili peppers, seeded and diced (when these aren't in season, I use 2-3 jalapenos)
1/4 cup diced red pepper (about 1/2 of a pepper)
1/4 cup diced red onion (about 1/2 of an onion)
2 t. chopped cilantro
1 t. lime juice
1 t. olive oil
1/4 t. salt

Combine and serve on meats such as pork, poultry, or fish. It's also great in a breakfast quesadilla**. I got the recipe from the grocery store and am absolutely in love with it.

So, I seeded, peeled, and diced the mangoes. Then I seeded and diced the jalapenos. Then I seeded and diced the red pepper. Then I cut up the red onion. I put all of the tiny little chunks into a container with a lid and began shaking it to mix them all together.

Then, the lid came off.

And the next thing I know, the last 45 minutes of my life were sprawled all over the floor, wasted.

All I could do was stand there and stare at the huge mess I'd just made. I was so sick and tired and upset I couldn't even cry, but believe me, I wanted to. I kept staring at all my hard work, willing myself to come up with a way to fix everything. I seriously considered throwing it all in the strainer and just giving it a really good wash. But I finally accepted that it was hopeless, scooped up my all my effort, and threw it in the garbage.

I texted my husband to tell him what happened and that I knew exactly how he felt after he dropped the cake. Though I lost everything and he only lost half his work, I was at least fortunate enough be without anyone to say awful things to me when it was all said and done.

In the end, I had just enough time to throw some salmon in the crock pot before I left for my internship, so I still had dinner made, but it was probably my most tragic moment in the kitchen to date.

Yesterday though, I triumphed. I have a few recipes that call for a whole chicken and I really enjoy making them. The Honey-Basted Chicken I made yesterday can be found here, but I make a few changes. First, I just use whatever potatoes I have on hand and skip the sweet potato altogether. It's worked pretty well. Second, I don't really measure anything in this recipe, I just kind of estimate it pretty liberally. Third, I have yet to buy kitchen string, so I haven't been tying the legs and no one's been the wiser.

Now, when I bought whole chickens at the regular grocery store, the neck and giblets were already removed, so I didn't really understand this whole nonsense about removing it. Further, I wasn't really sure what giblets were, because we pretty much exclusively bought boneless skinless breasts at my house. So when I started buying whole chickens at the co-op grocery store, I found that the neck and giblets were still very much attached to the chicken. I found the giblets while I was acting incredibly grown-up and making my chicken dance around like it does in old Looney Tunes cartoons, when the giblets unexpectedly dropped out of... you know where.

The last time I tried to cut out the neck, I really had no idea what I was doing, and I ultimately cut most of the back of the chicken off. I knew this couldn't be the right way to do it because I've gotten whole chickens with a back and no neck before. There has to be a way to keep the back intact, I thought.

***NOTE: THE REST OF THIS STORY (AND PICTURES) ARE NOT FOR THE WEAK. STOP READING NOW.***

So this time, I again did no research and began playing with my chicken to figure out how to get this blasted neck out. I grasped the end of the neck and began pulling it around, willing it to wriggle loose and slide right out.

And then it happened.

It didn't just slide right out, but it did loosen its grip on the rest of the chicken. I wriggled it some more and it loosened again. I grabbed a knife and started sticking it inside the chicken to cut some of the pieces that were holding onto the neck and spine.

Slowly but surely, the neck began it lose its grip on the chicken. I began pulling it out the top of the chicken and the chicken began trying to turn itself inside out, but was still remaining more or less intact. I got to the point where I could stick my hand inside the neck hole and break the neck's grip on the legs. Once I disconnected the legs, I managed to wriggle the neck and some of the ribbing right out. A bit was still left in there, and I went after some of it, but I managed to get out the majority of it without severely damaging the appearance of the bird.

Here are my treasures:


Not the best picture and very horror-film-esque, but the spine is that big thing on the right, the giblets are the dark blobs on the bottom left, and the pink-ish stuff on the left is the saggy lady bits (Both of my giblet-ed chicken have had really droopy lady parts for some reason unbeknown to me, so I cut off the extra parts). At the top left is one of the thigh bones I pulled out kind of on accident.

And here is my happy but spineless chicken:


Note its casual yet mildly sassy pose.

I think it may have been easier to pull everything out of the big opening where the droopy lady bits reside rather than the much smaller neck hole, so I'll probably try that next time, but this was still a big success in my book.

The recipe is delicious (my favorite part is hands down the potatoes), but one problem I've had over and over is that my whole kitchen fills up with smoke while its cooking. To the point where I have to open my back door and my kitchen windows and run a fan or two and my smoke detector probably went off. The bird gets a little blackened from the honey glaze, but the smoke starts before that even. I think it may have something to do with the bird juices, and maybe I just need to do a better job of not spilling them all over the pan or maybe that's what tying up the legs stops from happening. So this may be a better recipe for later spring when the doors and windows all already open, but I'm gonna keep making it and maybe one day figure out how to avoid the whole smoky house problem. But that'll just have to be a triumph for another week.

**Breakfast Quesadilla Recipe (1-2 servings)
Mix 1/3(ish) cup of mango salsa with 2-3 eggs and scramble.
Grill one tortilla and sprinkle shredded cheese over whole tortilla.
Once cheese is melty, add salsa egg mixture to one half of the tortilla.
Add crumbled bacon (about 2 slices) on top of egg mixture.
Fold over empty tortilla half. Remove from grill, cut and serve with sour cream.